The Ultimate Guide to Garage Floor Resurfacing: Materials, Steps, and Costs

The garage floor is often an overlooked part of a home, but it plays a significant role in both functionality and aesthetics. Over time, garage floors can deteriorate due to wear and tear, chemical spills, or simply the passage of time. Garage floor resurfacing is a cost-effective way to rejuvenate your garage, making it more durable and visually appealing.
Why Resurface Your Garage Floor?
Before delving into the materials, steps, and costs of garage floor resurfacing, it is essential to understand why you might want to undertake this project. Resurfacing your garage floor offers several benefits:
Improved Aesthetics: A freshly resurfaced garage floor can significantly enhance the overall look of your garage. You can choose from various decorative finishes to match your style and preferences.
Enhanced Durability: Resurfacing adds a protective layer to your garage floor, making it more resistant to damage from heavy vehicles, chemicals, and other potential hazards.
Increased Safety: Cracks and uneven surfaces can be safety hazards in your garage. Resurfacing helps create a smooth, even, and slip-resistant surface, reducing the risk of accidents.
Easier Maintenance: A resurfaced garage floor is easier to clean and maintain. There is less chance of spills or stains penetrating the surface, so cleanup is much easier.
Higher Property Value: A well-maintained garage can boost the resale value of your home. Prospective buyers appreciate a clean and functional garage space.
Now that you understand the advantages of garage floor resurfacing, let's dive into the materials, steps, and costs involved in this project.
Materials for Garage Floor Resurfacing
Choosing the right materials is crucial for the success of your garage floor resurfacing project. The primary materials you will need include:
Concrete Resurfacer: This is the key material for garage floor resurfacing. It is a polymer-modified cement-based overlay that can be applied to your existing concrete floor. Concrete resurfacers are available in various formulations, so be sure to choose one suitable for your specific needs.
Epoxy Coating: Epoxy coatings are another popular choice for garage floor resurfacing. They provide a high-gloss finish that is not only durable but also resistant to stains and chemicals. Epoxy coatings come in various colours and can be customized to your liking.
Concrete Sealer: After resurfacing your garage floor, it is essential to apply a concrete sealer to protect the surface from moisture, stains, and wear. Sealers are available in different types, including acrylic, epoxy, and polyurethane.
Cleaning Supplies: Proper surface preparation is critical for a successful resurfacing project. You will need cleaning supplies such as a pressure washer, degreaser, and scrub brush to remove dirt, oil, and stains from the existing floor.
Concrete Repair Products: If your garage floor has cracks or surface imperfections, you'll need concrete repair products like patching compound or crack filler to fix these issues before resurfacing.
Safety Equipment: Do not forget safety gear like gloves, safety glasses, and a respirator mask when working with resurfacing materials, especially if you're using epoxy coatings.
Steps for Garage Floor Resurfacing
Garage floor resurfacing is a multi-step process that requires careful preparation and execution. The following steps must be followed:
1. Prepare the Garage
Clear the Space: Remove all items from your garage, including vehicles, tools, and storage items. Ensure the area is completely empty.
Clean the Floor: Use a pressure washer and a degreaser to thoroughly clean the existing garage floor. Pay special attention to oil stains, dirt, and grime. Rinse the floor until it's completely clean.
Repair Cracks and Imperfections: Patch any cracks or holes in the concrete surface using appropriate concrete repair products. Allow these repairs to dry completely before proceeding.
2. Etch or Grind the Surface
Etching: If you are using a concrete resurfacer, etch the surface to provide better adhesion. Etching involves applying an acid solution and scrubbing the floor to create a rough texture. Rinse the floor thoroughly after etching and allow it to dry.
Grinding: When using epoxy coatings, it is often recommended to mechanically grind the surface to remove any existing coatings, stains, or imperfections. This creates a clean, porous surface for epoxy adhesion.
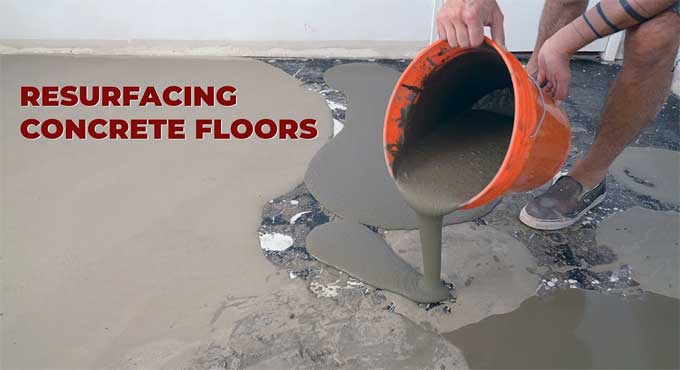
3. Apply the Resurfacing Material
Mix and Apply: Follow the manufacturer's instructions to mix the concrete resurfacer or epoxy coating. Typically, you will mix the material with water or a hardener. Apply it to the garage floor using a trowel or squeegee, working in small sections.
Spread Evenly: Spread the material evenly across the floor, making sure to maintain a consistent thickness. Use long, sweeping motions to create a smooth surface.
Decorative Options: If you want a decorative finish, consider adding colour flakes or other decorative elements while the epoxy is still wet.
4. Allow for Drying and Curing
Drying Time: The drying time will vary depending on the resurfacing material you've chosen. Concrete resurfacers may take a few hours to dry, while epoxy coatings can take up to 24 hours.
Curing Time: After the initial drying, the resurfaced floor needs time to cure fully. This can take several days to a week, during which you should avoid heavy traffic or placing objects on the floor.
5. Apply a Sealer
Sealer Application: Once the resurfaced floor is fully cured, apply a concrete sealer to protect the surface. Follow the manufacturer's instructions for the sealer you have chosen.
Multiple Coats: Depending on the sealer type, several coats may be necessary. Allow each coat to dry between applications.
6. Reorganize Your Garage
Move Back In After the sealer has fully dried and cured, you can move your items back into the garage. Be cautious when placing heavy objects to avoid damaging the newly resurfaced floor.
Garage Floor Resurfacing Costs
The cost of garage floor resurfacing can vary widely depending on several factors, including the size of your garage, the materials used, and whether you choose to hire professionals. Here's a breakdown of the potential costs involved:
Materials: The cost of materials, including the concrete resurfacer, epoxy coating, and sealer, can range from $2 to $5 per square foot. For an average-sized two-car garage (around 400 square feet), you can expect to spend $800 to $2,000 on materials.
Labour: If you hire professionals to resurface your garage floor, labour costs will be a significant portion of your budget. Labor costs typically range from $3 to $7 per square foot. For a 400-square-foot garage, labour costs may range from $1,200 to $2,800.
Equipment Rental: If you choose to DIY, you may need to rent equipment like a pressure washer, grinder, or concrete mixer. Equipment rental costs can vary but might range from $50 to $200 per day.
Surface Preparation: If your garage floor requires extensive repairs, such as crack filling or grinding, you will incur additional costs for these materials and labour.
Decorative Finishes: If you opt for decorative elements like colour flakes or custom designs, these will add to your overall cost. Decorative finishes can range from a few hundred to several thousand dollars, depending on complexity.
DIY vs. Professional Installation: Doing the job yourself can save on labor costs but requires time, effort, and skill. Hiring professionals ensures a high-quality finish but comes with higher labour expenses.
To get an accurate estimate for your specific project, it is recommended to obtain quotes from local contractors and suppliers. Additionally, consider the long-term value of investing in a quality garage floor resurfacing, as it can enhance your home's appeal and durability.
To learn more, watch the following video tutorial.
Video Source: FIX IT Home Improvement Channel
Maintenance and Care
After completing your garage floor resurfacing project, proper maintenance and care will extend the lifespan of the new surface. The following are some maintenance tips you should keep in mind:
Regular Cleaning: Sweep or use a leaf blower to remove dirt and debris regularly. Occasional mopping with a mild detergent can help keep the surface clean.
Avoid Chemical Spills: Clean up any chemical spills promptly to prevent damage to the sealer or epoxy coating.
Protect Against Impact: Place rubber mats or rugs in high-traffic areas to protect against wear and tear from vehicles or heavy equipment.
Reapply Sealer: Depending on the type of sealer used, you may need to reapply it every few years to maintain its protective qualities.
Inspect for Damage: Periodically inspect the surface for any cracks, chips, or signs of wear. Prevent further damage by addressing any issues as soon as possible.
Conclusion
Garage floor resurfacing is a valuable investment that can improve the aesthetics, durability, and safety of your garage space. Whether you choose a concrete resurfacer or epoxy coating, proper preparation and application are key to a successful project.
While costs can vary, the long-term benefits of a well-maintained garage floor make it a worthwhile endeavour. Whether you decide to DIY or hire professionals, a resurfaced garage floor can transform your space and add value to your home.